Ruth J Jamieson Art

Ruth J Jamieson created artwork and designs in a variety of themes influenced by interests in nature, spirit, science and fantasy.

This content shows Simple View

admin

Garage Mahal

It was a beautiful, hot summers day

and we loaded the kids, food and tools in the van and set out for the lake with a view to cladding the garage.
I’m sure the kids were thinking more about playing but Ruth and I, at least, were set on working.

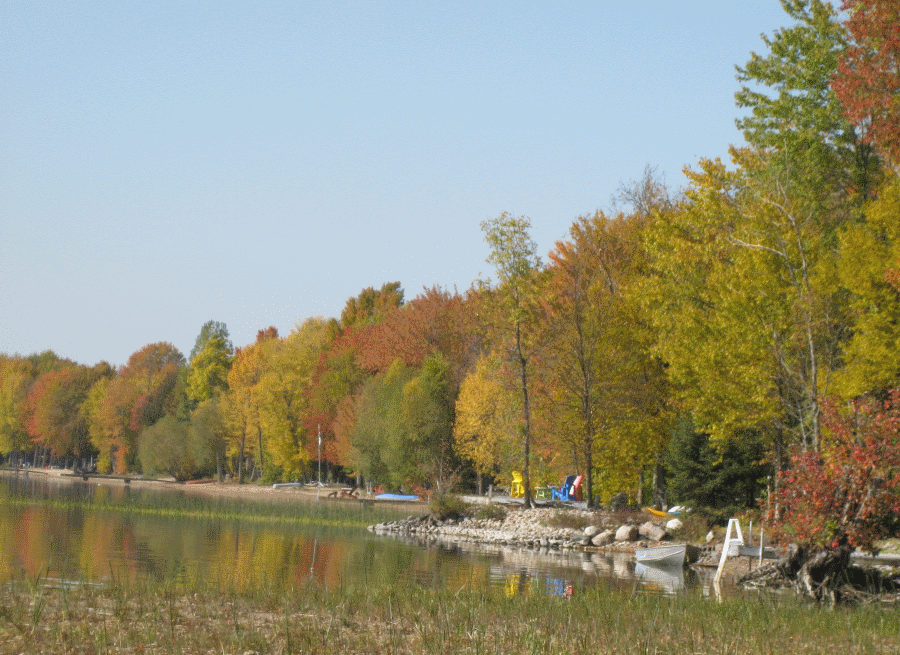
It is always about 2 degrees Celsius cooler at the lake than the big city and there is usually a breeze coming off of the lake.

This breeze is a great benefit, usually.
Its cooling effect means we only have a couple of days a year where we would even consider air conditioning.
So we didn’t put AC in choosing cold drinks and cranking up the fans instead.

As we found out in Deforestation Part 2, the wind is not always our friend.
Trying to install 4 foot by 8 foot sheets of paneling is like sail boarding only you end up doing a face plant in the dirt instead of taking a dip in the water.

Between Ruth and I we were able to close in the three sides of the garage and the road side around the garage door opening.
It was quite the work out, one which I was destine to repeat years later, only alone this time.
We had finished the house and lived there a while and then Ruth said she wanted to live in town. So we moved to the city and rented the house out.
The renters said they wanted to install two windows on the west side of the house.
I wasn’t living there so I said “Sure”.
Later on we moved back out to the lake and realized that we did not want two large windows facing the neighbour and leaking all our expensive heat out into the cold winter night.
The plan was that we would remove the windows from the living room, re-side the wall, insulate and drywall. We would also put a wood stove in to supplement the electric baseboard heaters.

I brought the 4 x 8 sheets from town and as I prepared to install them, Ruth went to visit a friend and the wind from the lake picked up.  The wind may not be sentient but it sure has a sense of humour.

So there I was.
Alone.
I’m on a ladder.
With a sail.

Had anyone been watching I am sure they would have scored my acrobatics a 9.0.

The joys of owning a house.

Next time, back to the build.

Hoisting the trusses.

And who doesn’t want an elephant in a gale postcard…


Drunken Elephant Postcard
Drunken Elephant Postcard by Octor_Arts
More Elephant Postcards


  • Categories:

Making Headway

The garage was up

and ready for cladding. With one exception, the garage door header.

We had chosen to put in a double wide door instead of the two single doors that were specified in the original plans. That meant we needed to put a header across the 16 foot wide opening to support the weight of the roof. I made the header of two pieces of 2 x 12 lumber about 17 feet long and with ½” spacers between.

That meant the header was an awkward to handle 170 lbs or about 120 lbs more than I should lift by myself.
Unfortunately I was by myself.
I could lift it a few inches off the ground.
Unfortunately it needed to sit 7 feet above the floor.

I had had the presence of mind to construct the header right in front of the door opening so I didn’t have to drag it too far to get it in place.
Since I could only lift it a short distance I figured I could raise it in steps.

header lift
header lift – not to scale

I drove a 3 ½” nail part way into the frame of the garage and lifted one end of the header on top of the nail.
Next I drove a nail a few inches higher on the other side of the door opening and raised the header to rest on the nail. Because the wood had been cut to fit on top of the Jack studs which were between the King studs, I could only angle the header up a small amount before it would not reach the nail so I continued lifting each side a few inches each time.

Progress

It was slow going but it was progress.
It wasn’t scary until I realized that I had a very loosely held 170 lb block of wood nearly 7 feet off the ground.
It did occur to me that being hit by this falling header might void my warranty.

Remember: This is NOT a How To blog. It is a how we did it blog. Take precautions, get help and if you don’t know how to do it, find out first.

Once the header was up on the Jack studs I nailed it in place and breathed a sigh of relief.

After that workout, putting the cladding on would be a breeze or so I thought.

After seeing my technical drawings some people ask me if I am an artist. To these people I say yes and offer prints at a reasonable price. Normal people can buy art here…


EARTH TEXTURE Genuine Fractal Tshirt
EARTH TEXTURE Genuine Fractal Tshirt by dequilla
See other Merchbooth T-Shirts at zazzle

  • Categories:

Framing the Garage

Back to Work

After a bit of a rest I got back to work.

I had the garage package, a hammer, saw and a large box of 3 ½ inch spiral nails. Why spiral nails and not common nails you ask?
I don’t do common.
Just kidding. Spiral nails hold better than the common nails and when you are building a house you think of things like that. Kind of like the old joke: I’d like some 2×4’s. How long? A long time, I’m building a house.

I laid out one wall, flat on the garage floor (well as flat as the floor would allow), just as the plans specified. I measured and marked the header and footer (the stick on the top and the bottom) and started nailing the studs in place. Two nails top and bottom.
It was beautiful.
It was 24 feet long.
It was too heavy and ungainly for me to lift.

Not only was it too heavy for me to lift, I also did not have a drill (or electricity) to drill the holes in the footer plate to go over the bolts in the concrete (yes I said concrete again) (this is a “how we did it” not a step by step how to).

More Manpower

This required more manpower. And a drill.

As for the “How to” part, you need to plan where to put the bolts or anchors in the concrete. To do that you need to know where the studs and doors will be and not put the bolts there. That’s where the blueprints or plans come in.
We ended up moving the location of the door so I had to cut a bolt out in that location, but, if there is one constant in construction, it is change.

The other thing that was required was a sill gasket. This is a strip of plastic-y foam that separates the wooden footer from the concrete, thereby preventing moisture from rotting the bottom of your wall which would be a bad thing.

1980’s

The next day I returned with my family and a hand drill. I did not think a cordless drill would hold a charge long enough to drill all the holes I needed. This was the end of the 1980’s. After using the hand drill I wish I had tried a cordless one.

Ruth and our son Matt and I were able to lift the first section of wall and brace it. We then proceeded to frame in the other three walls before calling it a day. It may have been a few days. I always think I work faster than the reality of it.

The Takeaways

Buy a cordless drill and extra batteries.

Wait until the internet is in common use and Google is invented and Google how to stuff.

Wait until cell phones are in common use so you can call for help.

If you want a unique April Fool’s gift for your significant other, or just a pet tag…

Pet tag
Pet tag by ladybuglane
Check out Dogs Pet Tags online at zazzle

  • Categories:

Hidden Danger

Not in Shape to Build a House

Maybe you work out at the gym or go running on a regular basis but it is not the same as working construction.

Ok, I didn’t run or work out but I had spent over 10 years as a carpet installer* and I thought that hoisting ungainly carpets to the second or third story of a tiny condo and then moving every stick of furniture some retiree kept from their previous mansion (including pianos) had kept me in reasonable shape.
Surprise!
Pouring and leveling the garage floor had left me re-thinking my level of fitness and I was happy to take a rest day.
All I had to do was meet the truck delivering the garage package.

Don’t Worry

I got a sinking feeling when I saw the size of the load and the complete lack of forklift to unload it.
As the driver was undoing all of the straps holding the load on, he said “don’t worry, the truck bed tilts and everything just slides off”.

Everything Did

Unfortunately I was right in thinking that it looked like a lot of material.
Once everything was on the ground the driver realized the guys in the yard had put two orders on the truck and someone else’s roof shingles were covering my driveway.

Asphalt shingles weigh between 60 and 80 pounds per bundle. It felt like these were the 80 lb shingles. We spent the next while tossing the other customer’s roof back on to the truck and strapping it down.

The Takeaways

  • Lift with your legs, not your back
  • Do not twist while throwing bundles of shingles. Just don’t.

I awoke that night with the worst pain I had ever felt. It was like a toothache in my spine and I could not stand on my left leg.
Ruth called the ambulance while I slid down the stairs to the main floor to wait. I wasn’t taking a chance on the stretcher and I crashing down the stairs as I was a bit overweight and it did not seem fair to the ambulance attendants.

Because I was overweight the doctor on duty thought I was having a heart attack. The nurse had the morphine injection ready and considering the pain I was in, I was looking forward to the needle which is something I had never said before.
Foolishly I said it was my back that was injured. The doctor said forget the morphine; give him a Tylenol 3 (which does absolutely nothing for me). He gave me a prescription for the pills and said “you will be back within 5 years for an operation”.  Then he sent me home.

I needed a cane to get around. Not fun.
X-Rays and bone scans indicated it was an L5 S1 injury and it was suggested a surgeon do some exploring in there. I said “No”.
Ruth suggested seeing a chiropractor. I did and after seeing him once a week for a month I was walking without a cane.
No back surgery for me 🙂

Takeaway Too

Be careful. Failure and injury are always an option.

* Fuzzy side up.

This is not a drawing of our house but if you need inspiration…


DUNVEGAN CASTLE POSTER
DUNVEGAN CASTLE POSTER by dequilla
More Acrylic Posters

  • Categories:

Hard and Fast Rule

Not Done

As I was finishing the previous post, Set in Concrete, I was hoping to be done with concrete, at least for a while.
I was wrong.

I feel I should mention a few more things about this essential building material.
You can buy bags of the dry product and mix up a batch at a time adding water, sand and aggregate, repeating the procedure until you have the necessary amount.
You can mix this in a container or wheelbarrow or rent a mixer which will take some of the back breaking labor out of the process.
But, if you have much concrete to pour, you might as well order in a truck load of premixed.

How Much

To do this you need to know how much you need.
Concrete is often sold in cubic yards or cubic meters. If you are going to pour a slab that is 4 inches thick and 20 feet by 24 feet you would multiply 20 x 24 to get the area in square feet then multiply that by 0.34 feet then divide this by 27 to get the cubic yards. (4 inches = 0.3333333 of a foot so I rounded it to 0.34).
My formula was (20 x 24 x 0.34 / 27) x 1.10 because, as with most estimates, you will want to add 10% extra just in case. It is better to have a bit more than not enough.
If you are arithmetically challenged or just want to double check your calculations, check the internet for concrete calculators. You can enter the length, width and thickness and you can get the answer in cubic yards or bags of the dry mix if you want to go that route. You may have to add the extra 10%.
Wish I had the internet when I was building.

But not too much Concrete

I mentioned in the last post that the concrete was building up in a wave as I pushed it toward the front of the form. I had to remove some of the extra so I dumped it, a shovelful at a time, into a rough slab in front of where the garage door would be. I could smooth it out later right?
The slab hardened before I could smooth it out and the stuff I dumped in front of the door followed suit.
It was a year or two later that I finally got around to taking a sledge hammer to the excess that sat guarding the front of the garage.

The Takeaways

• Measure
• Measure again
• Check your calculations
• Have someone else check your calculations
• Have enough help when working with concrete
• Deal with concrete while it is still wet (or else)

Here is a Basset Hound pillow you can buy if you like pillows with dogs…though with it staring like that I would have the feeling I should take it out for a walk or feed it

Basset hound pillow
Basset hound pillow by ladybuglane
Browse other throw pillow designs on Zazzle.

  • Categories:

Set in Concrete

The last post left me standing by a pile of setting concrete watching the cement truck’s tail lights disappear while thinking, “Maybe a little research isn’t such a bad idea”.

Time and Tide and Concrete

Unlike some concrete, which is self leveling, this stuff just sat there hardening in a lump. Grabbing a shovel and jumping in to the floor area, I started to distribute the concrete as best I could.

Concrete is Very Heavy

I ended up standing in the stuff so I could reach the mounds with my long handled shovel. The truck driver had said that it was corrosive and will eat away at your boots so I should try to stay out of it.
Hint: If someone with years of experience gives you some advice – take it.

He was right. Though my boots were OK after a quick rinse in the lake, I found that some concrete liquid had leaked in and had caused a mild burn on the top of my foot. I hadn’t noticed as I frantically tried to flatten out the uncooperative mountain of sand and gravel that was threatening to remain an art installation instead of a floor.

I quickly fashioned a straight edge out of some of the left-over foundation framing boards and proceeded to attempt to level out the floor. Starting from the lake side, I dragged the 20 some foot straight edge over a few inches of concrete toward the road side and drove a large nail into the wooden form to hold the straight edge in place. Then I ran over to the other side and dragged the straight edge up a few inches, putting a nail in to hold the board in place. This continued for quite some time, pushing the mud forward and up. Every foot or so, I had to wade in and shovel the build-up further ahead.

concrete form and straight edge
A depiction of the method I used to level the concrete in the 20 foot by 24 foot form

This running back and forth, nailing and shoveling was incredibly exhausting and so boring that I will not even attempt to describe it.
The outcome was that the new floor sloped upwards as I got closer to the road side of the property. It looked like a gentle wave frozen in time. Unlike the smooth polished garage floors you usually see, this one bore an uncanny resemblance to a cheese grater.

This was not the look I was going for but as the concrete had become hard enough to walk on and I had no float for smoothing the surface and no real idea of how to work with concrete, I let solidifying slabs lie.

I rationalized that the rise in the floor would help keep water out and the rough surface would provide traction.

Information is Good

In hindsight, I should have done more research about working with this material. We had books on almost every other aspect of the construction.
In futuresight, the internet would have been invaluable but unfortunately we were a few years away from the ubiquitous access we enjoy today.

Next time… The Garage Package

If you purchased the last posts dog clothing to tease your kids, they could tease you back with this apocalypse wear for your pooch…


Apocalypse Livestock Doggie T Shirt
Apocalypse Livestock Doggie T Shirt by damccaskill
Check out Merchbooth Pet Clothing online at zazzle

  • Categories:

Construction Begins

Disclaimer: I am not a contractor and these posts should not be taken as professional advice. Always check with authorities, building codes, get permits, consult experts and hire licensed professionals as required by law or even if you are just not sure.
Remember, failure is always an option. It is better to be safe and legal.

Half Load Restriction

In spring there is a half load restriction on our 2 mile dirt road. This is to protect the road and limits when we could start having materials delivered.
Once lifted, we had a culvert installed and few loads of sand and gravel brought the driveway up to where we would build the first part of our home.

We Lucked Out

The location of the garage and house was to be over an old gravel service road. We had known the road was there but it was mostly obscured by brush. This provided a solid base to build on.
You want that sort of thing in a house.

To start we chose a garage package from a local building centre. The package included framing, trusses, roof sheathing, shingles, roofing paper and flashing, one small window, a man door* (person door to be PC), and a double garage door. The outside was 4 x 8 bead board sheathing.

What was not included was a foundation so with the materials delivery date looming we had to get cracking. We measured and staked out the forms to accommodate the 20 x 24 foot structure, scooped out the loose soil in the footing area and tamped down the gravel we added to provide a firm foundation for the concrete. To tamp the ground you can do as the next door neighbor did and smack the ground repeatedly with a flat steel plate on the end of a steel pole for a long time, or rent a gas powered tamping machine. Being on a budget we borrowed the flat steel plate on the end of a steel pole. Doing this, you could give up your gym membership for the duration of the build.

Concrete Day

We ordered concrete with a fiber en-trained into it for added strength figuring the fiber plus the rebar in the footings would be overkill but it is good to err on the side of strength.

Not knowing anything about pouring concrete I set out by myself to wait for the concrete truck.
It arrived and when the driver got out he said, “Where is everyone”?
I said, “I am it”.
He was of the opinion that to pour a 20 x 24 foot slab you needed about 5 people but as you can’t leave concrete in the truck for long he had to go ahead and dump it out.
He tried to distribute the load over the new garage floor area as best he could and wished me luck.

I was 20 minutes out of town and the concrete was starting to set up.
Time to get to work.

* the man door is the door a person would use instead of opening the large door for the car.

Next time … Set in Concrete

To keep your pup warm or just bug your kids you can order…

Small Dog Pet Clothing
Small Dog Pet Clothing by damccaskill
See all the dog clothes at zazzle.com

  • Categories:

Deforestation Part 2

The Trees

Now that we had decided where the house would sit we could begin selecting trees to remove. We wanted to keep the place as natural as possible but with the house, driveway and septic system, some trees had to go.
We were to find out later we should have taken one more tree down, but that will be another post.

lot with trees down
Some of the smaller trees down

Time Ain’t On My Side

I started out thinking I could just putter away until the lot was clear. I had a hatchet, axe and saw which seemed to work in Rush’s song “The Trees”, but in real life with me providing the elbow grease, it was going to take forever.
I could make some headway chopping and sawing the softwoods but against the larger hardwoods the bucksaw was very slow when it didn’t bind and my axe was causing me a lot of pain.
There are different types of axe for different jobs. The axe I had was one piece of steel with a rubber coating on the steel handle. It was great for brush and small trees but it either bounced off the larger hardwoods or stuck in the trunk of the tree leaving my arms feel as though I had just hit a brick wall.

We decided to rent a chainsaw.

If you ever have to cut trees of any size larger than a couple of inches in diameter, you will want to get a chainsaw or hire someone to cut down the trees. If the wood on your property has enough value some companies will do the work in exchange for the logs. If you do decide to do your own cutting you should get some instruction in the use of all the cutting implements and use all personal safety equipment.
I was employed one winter to clear ski trails and was shown how to use chainsaws and I even had my own cutter’s pants. The pants had fiberglass layers in the legs, which in the event of your saw mistaking your leg for a tree, would tangle in the teeth of the chain, stalling the engine.

The rental chainsaw sped things up a lot but with the number of trees that had to be felled, limbed and cut, Ruth realized it would be cheaper to buy our own, so on my birthday I got a brand new 18” Poulan chainsaw.

Meeting the Neighbors or Disaster Struck

Even though I had experience felling trees, it is dangerous unpredictable work.
Trees can go in the wrong direction in spite of the proper notching and cutting techniques.

I was cutting the last tree of the day. The tree was straight, the air was calm, and I notched the trunk so the tree would fall toward the lake.
A sudden breeze came off the lake and the tree fell back toward the road landing on the power lines.
The tree started to smoke. I thought “the fire will burn right through the trunk and the tree will fall on the road where I can cut and remove it”.
Unfortunately the power line melted and the tree fell on the next power line which also melted.
The power lines ran across the ground trapping our van and stranding us there.

Someone called the power company and we got to talk to our neighbors while watching the lines being repaired. Apparently this had happened to other “lumberjacks” on our road.

Next time … Construction Begins

Whether or not time is on your side you can keep track of it with…


Gnarly tree
Gnarly tree by ladybuglane
Browse additional Clocks

  • Categories:

Deforestation – Clearing the Land

Choosing the Lot

We had visited the area with one of the Band representatives and chose our lot. All the lots were 100 feet along the road and over 100 feet down to the lake. Of the 50 original lots there were only a few remaining.
It was difficult to see all the features of the property due to the trees and bush but we choose the lot that we liked the best in part because it appeared to be higher than all of the surrounding lots.
This turned out to be a good move as in the years to come some neighbors experienced flooding and loss of their beaches due to erosion from storms.

lot with brush cut
The lot with some brush cut

Siting the House

The lots had been surveyed and our first job was to decide where to put our home. Some people had built near the centre of their lot while others built to one side or the other. We chose to build to the side leaving ample room for expansion.

The conditions of the lease allowed for a setback of four feet from the property lines on either side, and you had to build more or less in line with your neighbors houses. The setback from the road was required for the installation of a septic bed that would be about 50 feet by 50 feet plus the septic tank. This however would be some time in coming.

First the Clearing

On evenings and weekends we would load the kids into the van and head out to the site of our home to be. The kids would play in an area away from the brush clearing and they had a ball in their woodland playground.

The work wasn’t too difficult as we were removing mostly brush and small trees with an axe and buck saw. The wood we cut was piled and fed to a small fire over which we cooked hotdogs, marshmallows and s’mores. It was just like camping and with all the exercise and fresh air everyone slept well.

Throughout the fall, friends from college would come out to help on weekends. We cleared a lot of the small brush and enjoyed a few bonfires.

With the site cleaned up, we had to decide which of the trees we needed to remove. We wanted to keep as many as possible but had to remove the ones growing where the driveway and septic system were to go.

Next – Deforestation Part 2

If you don’t find the notion of writing things down on paper that weird, you can buy a notebook with one of our winter visitors…

Bluejay Spiral Note Book
Bluejay Spiral Note Book by ladybuglane
Design your own customisable notebooks online at Zazzle

  • Categories:

The Search Begins

Ruth was the driving force behind the whole endeavor

She, being an artist, had a vision of the house and drew up the plans. Several plans including an octagonal house, a multi storied house and the one which was actually achievable given our budget and skills, a modest rectangular house.
We didn’t want to build in the city with its high property costs, taxes and the normal building process of contractors and permits.

On the lake

Ruth had found waterfront property only 20 minutes from the city. Was there a catch? It depends on your views about property ownership.
The lots were being leased to non-natives by a local First Nations group for about a $1000 per year.

Leased land or owned land

Most people feel that they have to own the land if they are going to build a house on it. Some people are leery of land leases because they have heard stories of massive price hikes and leases not being renewed. These things have happened and you can find related news stories on the internet.
But, you can also find stories of people owning land but not the oil and mineral rights underneath their property.
There are also news stories of the government telling people that their land is being appropriated. They are told how much the government is going to pay and when they have to get out. I actually met a lady who built a home to retire to with her husband and within a year or two the government said they were putting a road through and the house would have to go. Here is a cheque, don’t let the door hit you on the way out.

Along the lake from our lot

Go for it

We looked at a couple of lots and went over the lease and decided we were going for it.
Truthfully we did end up having a court case and long negotiation when our Lessor proposed a hike in the lease amount, but that will be another post.

Next time… Deforestation

The view from my back yard is available as a poster at…

AS ABOVE, SO BELOW POSTER
AS ABOVE, SO BELOW POSTER by dequilla
Look at other Digital Posters at zazzle.com

  • Categories:


top